Email Setup – Android & Thunderbird
Android
For configuring E-mail on Thunderbird, please follow this documentation: https://csky.net/faq/email-setup-thunderbird/
• Step 1: Open your Mail app. (The steps to set up email on your Android device may vary depending on the make and model)
• Step 2: Type your Email address and Password and tap Manual Setup.
• Step 3: Select POP/IMAP. (POP to save new emails exclusively to that device, IMAP to save new emails on all devices)
• Step 4: If configuring IMAP, follow these Steps, if configuring POP continue to steps 7-8.
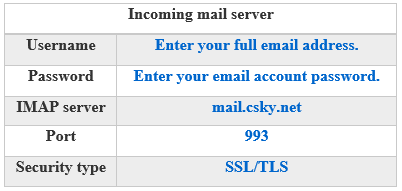
• Step 5: Enter these settings for the incoming IMAP mail server:
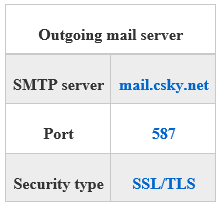
• Step 6: Enter these settings for the outgoing IMAP mail server:
If Configuring POP
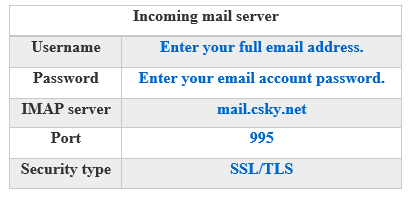
• Step 7: Enter these settings for the incoming POP mail server:
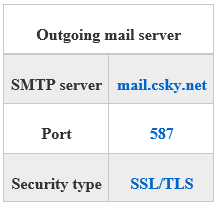
• Step 8: Enter these settings for the outgoing POP mail server:
• Step 9: Select Require sign-in and make sure your Username (your full email address) and Password are correct.
• Step 10: Tap “Next”.
• Step 11: Tap “Next” again. Then name your account and enter the name you want to display on outgoing messages.
• Step 12: Tap “Done”.
• Step 13: Congratulations, your email account is set up on your Android device!